
OS MAP HEART GARLAND

A Valentine’s Day themed garland reusing some old OS maps and yarn I bought for a different project. This can be made as long or as short as you would like it to be. I chose the pom pom colours to reflect the colours of our living room and use up some old yarn I had.
Equipment needed:
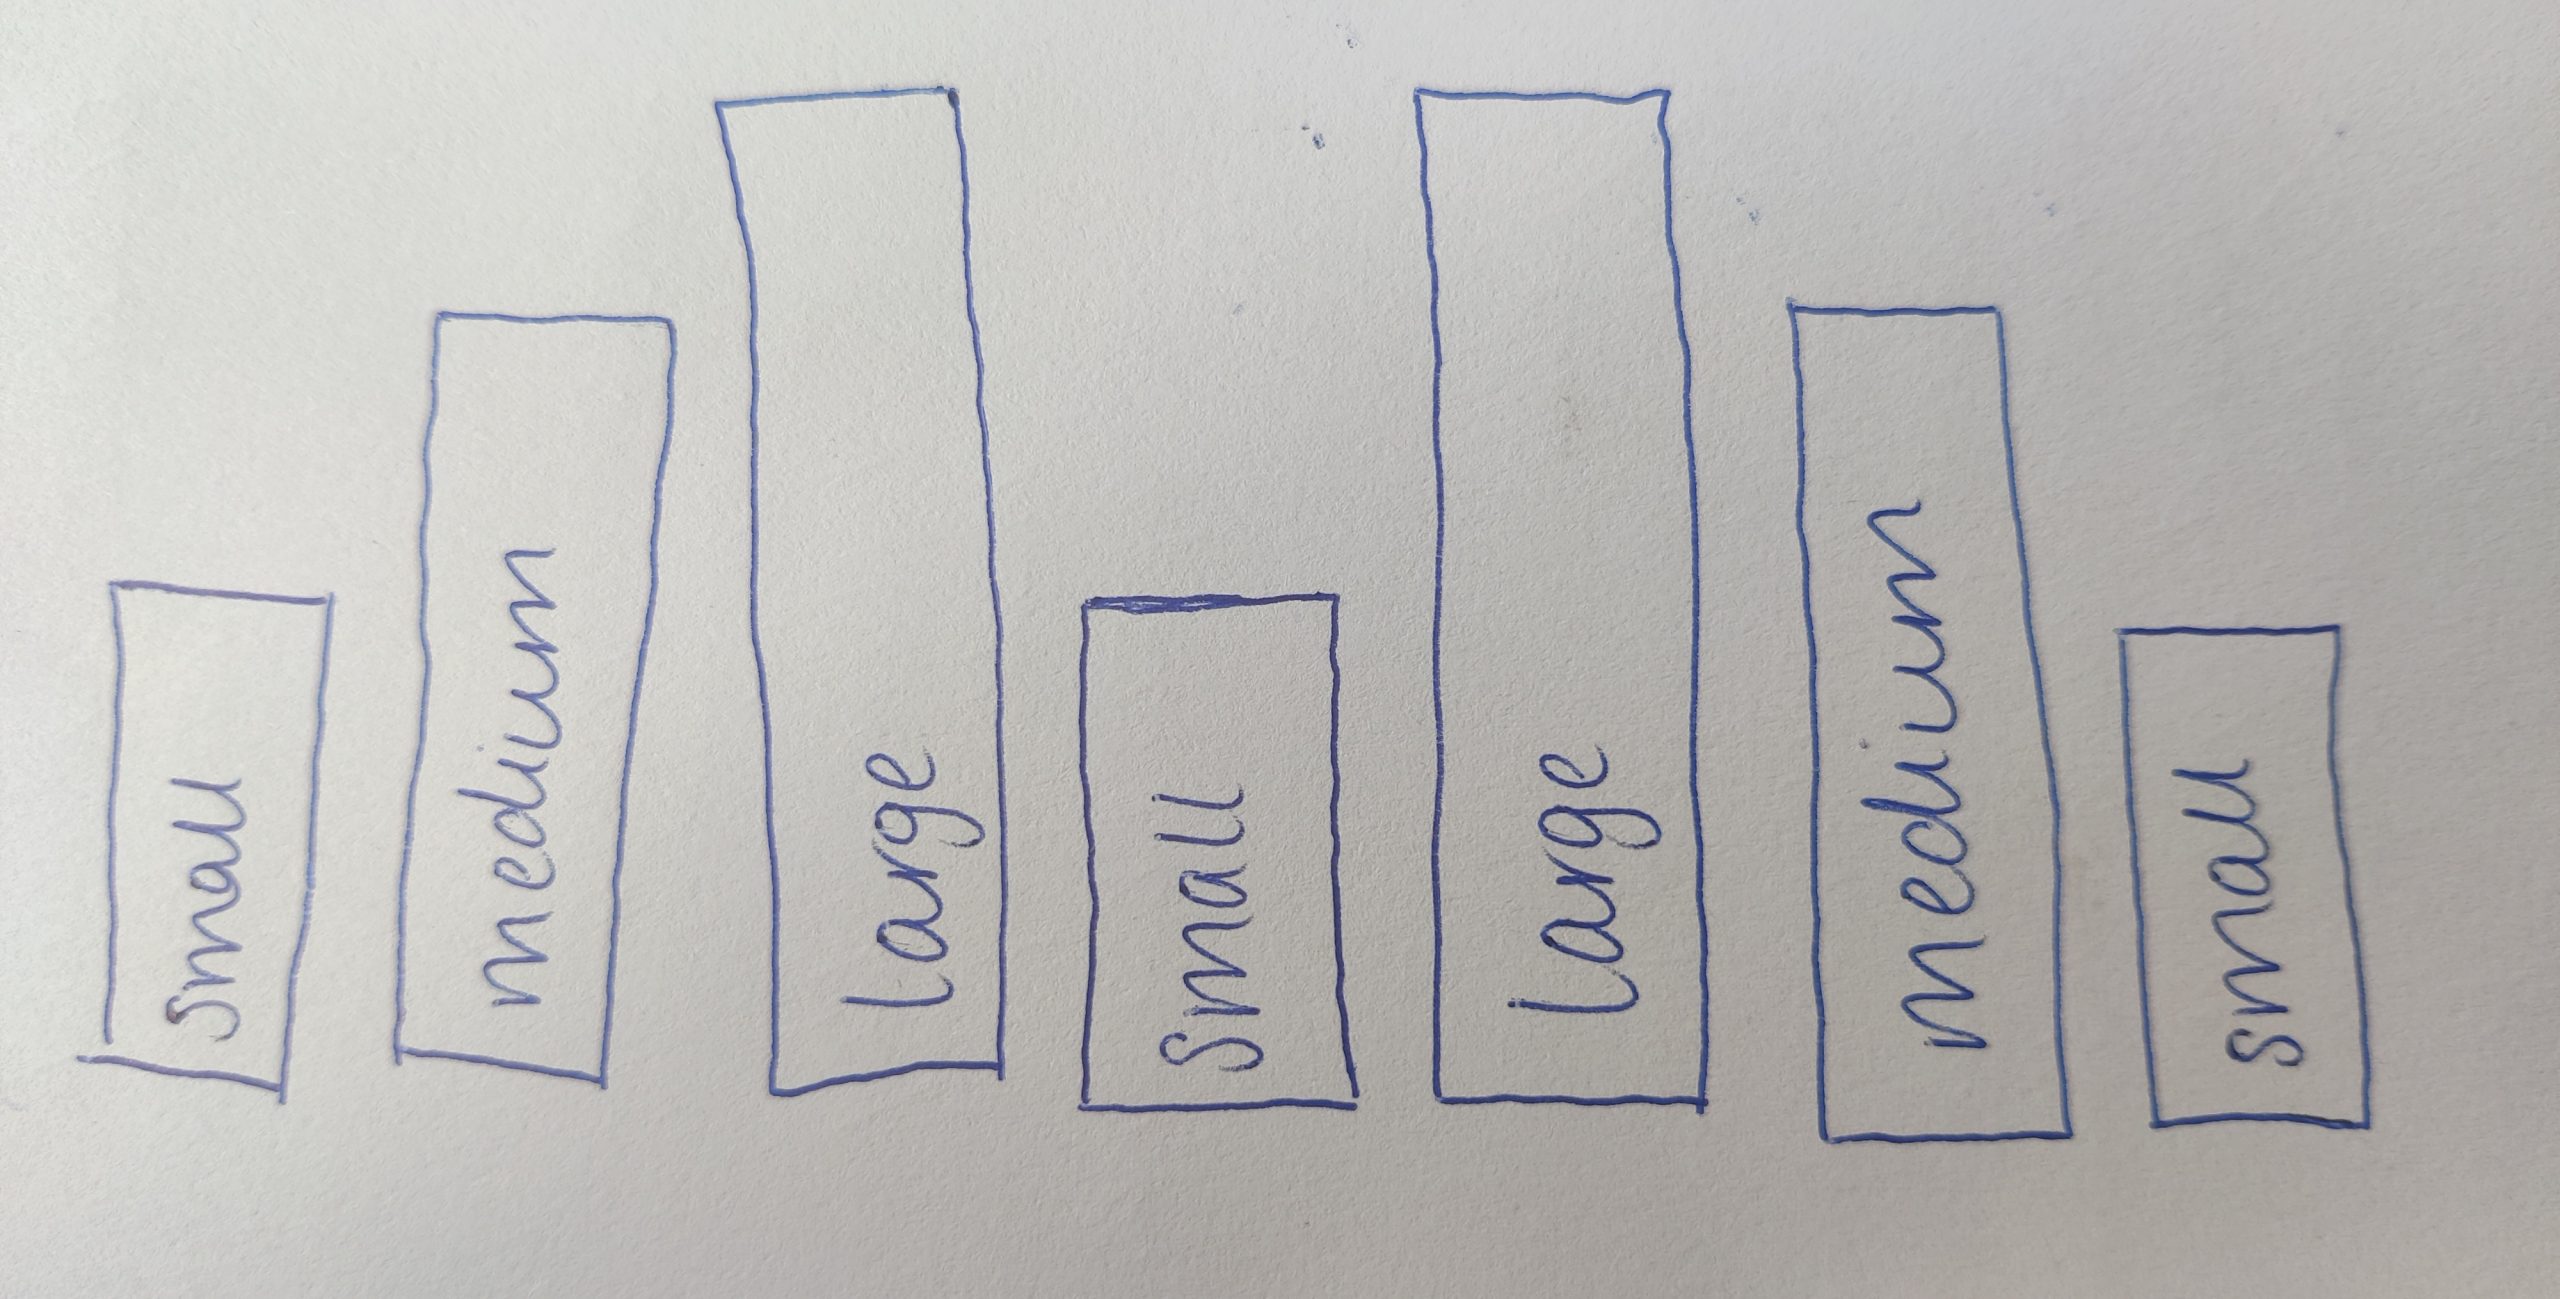
- OS map – cut into rectangles of measurements below
- 3 small rectangles of 2 x 5 inches (5 x 12 cm)
- 2 medium rectangles of 2 x 7 inches (5 x 18 cm)
- 2 large rectangles of 2 x 9 inches (5 x 23 cm)
- PVA glue & glue spreader
- Yarn in 3 colours
- Pom pom makers (small & medium)
- Hole punch
- Thread (3.62m to string garland together)
Method:
- Cut the OS map into 7 rectangles of the sizes above. My map was only one sided so I cut 14 pieces and stuck them together to make the pattern double sided.
- Lay out the pieces in the pattern as described.
- 1 small, 1 medium, 1 large, 1 medium, 1 large, 1 medium, 1 small
- Put a line of glue along the bottom of all the pieces in the pattern as above and hold secured for a minute or two until dried and secure.
- Starting with the smallest rectangle on the outside of the heart, put a line of glue along the top of the piece and fold it around and secure it to the bottom of the heart. Again, hold until secure.
- Using the hole punch, create a hole in the piece of map which is sticking up allowing it to be hung up.
- Repeat for as many heart shapes as you wish (for my garland, I made 10 hearts)
- Using the pom-pom makers, make 13 pom poms of assorted colours. I made 9 small pom-poms all in pink and 4 medium pom-poms, 2 in each of the other 2 colours.
- Trim the pom-poms to your desired shape. Leave the length you used to tie the pom-pom together as this can be used to tie the pom-poms to the garland.
- Measure the length you would like your garland to be and divide it by the number of pieces you have created. For my length of garland which was 3.62m, I used a spacing of 18cm.
- Finally, when I hung them up, I interwove them with some fairy lights.
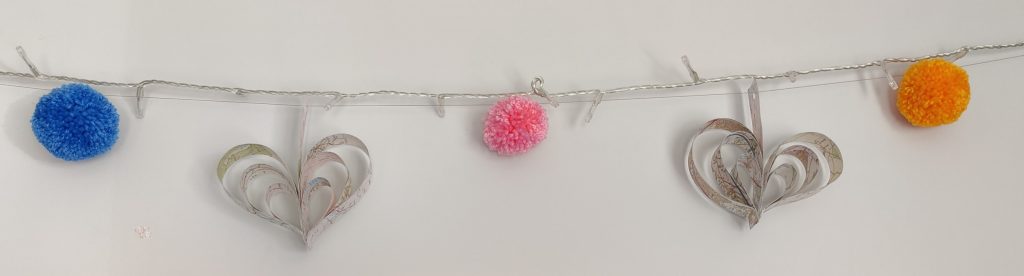
So that’s it, you are now ready to hang your garland!
I did this with OS maps because I have a large stash of them and like the decor look. However, you could repeat this with any pretty coloured or patterned paper.
Thank you for making it to the end of this blog post. Please engage with me by leaving a comment, liking or sharing the joy with someone else. Talk soon, Ellie x
-
-
2 years
Tagged boredom, DIY, transformation, upcycling